Host React frontend app on Azure Storage Account
![]()
Running a React frontend web application on an Azure Storage Account is a great way to host your app with a low cost and high scalability. Azure Storage Account can handle up to 20,000 requests per second out of the box. It has a lot of features that make it a great choice for hosting static websites including:
- Public anonymous access over HTTP/HTTPS;
- Custom domain names;
- Static Website feature;
In this post, we’ll go through the steps of setting up a new Azure Storage account and deploying your React app to it.
In the end of this post you also can find the links to the terraform template and GitLab CI/CD pipeline that will automate the infrastructure creation and deployment processes.
Plan
We are not going to use ‘Static Website’ feature of Azure Storage Account because it does not meet the requirements of the React apps. The thing is that most of the react apps use react-router to handle routing. In these cases, the index.html file is served for all requests. However, the static website feature of Azure Storage Account does not support this. This can be done by using Azure CDN profile.
So the plan is to:
- Create a new Azure Storage account.
- Then create Azure CDN profile and configure it to redirect all requests to the index.html file.
Step 1: Resource Group
First, we need to create an Azure Resource Group. The resource group is a logical container for the resources that we will create later.
 The rest of settings can be left as default.
Step 2: Storage Account
Next, create a new Azure Storage account that will keep our react application (here is how to do this using Azure Portal). Fill in the necessary details and select a subscription and resource group name created in the previous step.
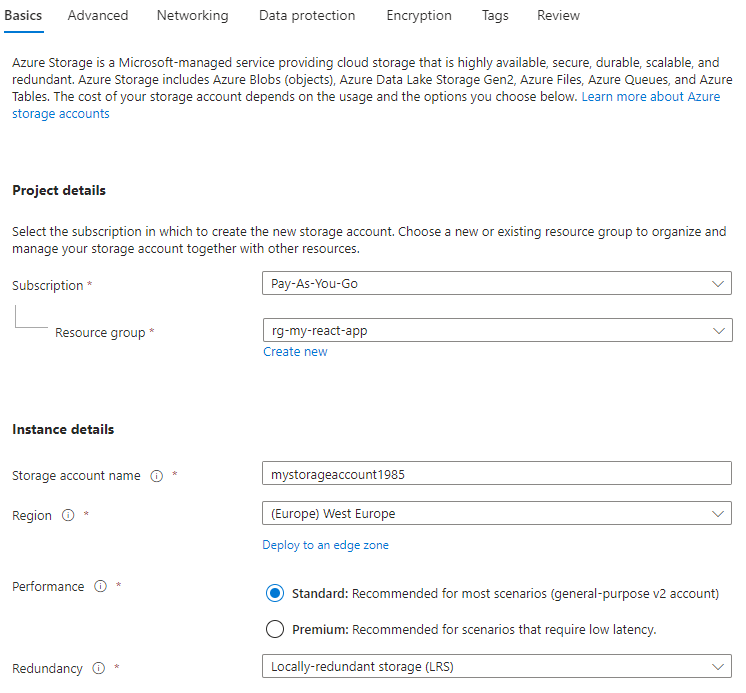 The rest of settings can be left as default.
Step 3: Storage Account Container
Files in Storage Account are stored in Containers so we need to create one. To do that go to the created Azure Storage account and click on the “+ Container” button.
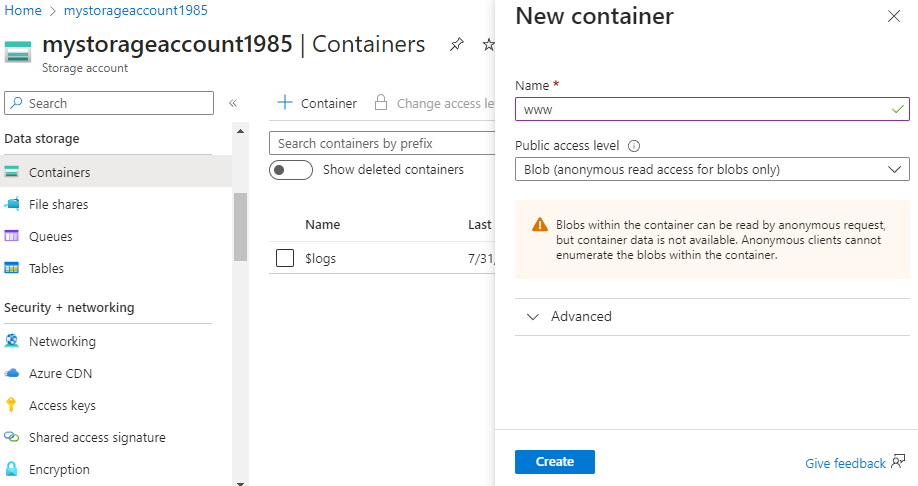 The name of the container does not matter. But it is important to set the access level to “Blob (anonymous read access for blobs only)”.
Step 4: Azure CDN Profile
Azure CDN profile is required to manage the routing of the requests to the index.html file.
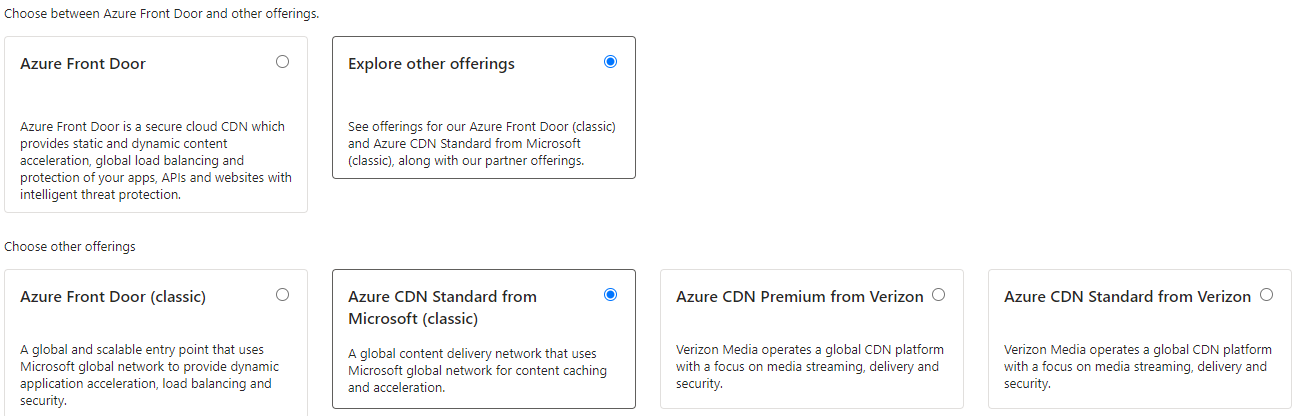
There are different types of CDN profiles. We will use the “Standard Microsoft” profile.
When you create the CDN profile, make sure you selected “Explore other offers” and then “Azure CDN Standard Microsoft (classic)” as on the screenshot below.
 Then fill in the fields as on the screenshot below.
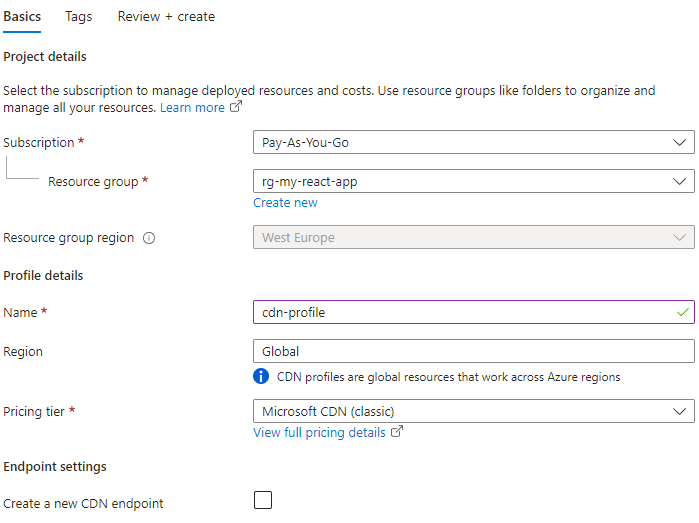 The rest of settings can be left as default.
Step 5: Azure CDN Profile Endpoint
After the CDN profile is created, we need to create a new endpoint.
Go to the created CDN profile and click “+ Endpoint” button.
 You need to fill in the following fields:
- Name: this will be the default hostname of your website. For example, if you set it to “myapp”, then the default hostname will be “myapp.azureedge.net”.
- Origin type: “Storage” (this will be the Azure Storage account that we created earlier).
- Origin hostname: the name of the Azure Storage account that we created earlier.
- Origin path: the name of the container that we created earlier.
- Origin host header: will be populated automatically once you select the ‘Origin hostname’ with the value of the name of the Azure Storage account that we created earlier.
Step 6: Rules Engine
Next we need to configure the rules for the endpoint.
Click on the “Rules engine” menu item under the “Settings” section.
Then click on the “Add rule” button.
The new rule block will appear. Click on the “Add condition” button and select “If URL file extension” condition.
Then fill in the fields as on the screenshot below.
Then click on the “Add action” button and select “URL rewrite” action.
Then fill in the fields as on the screenshot below.
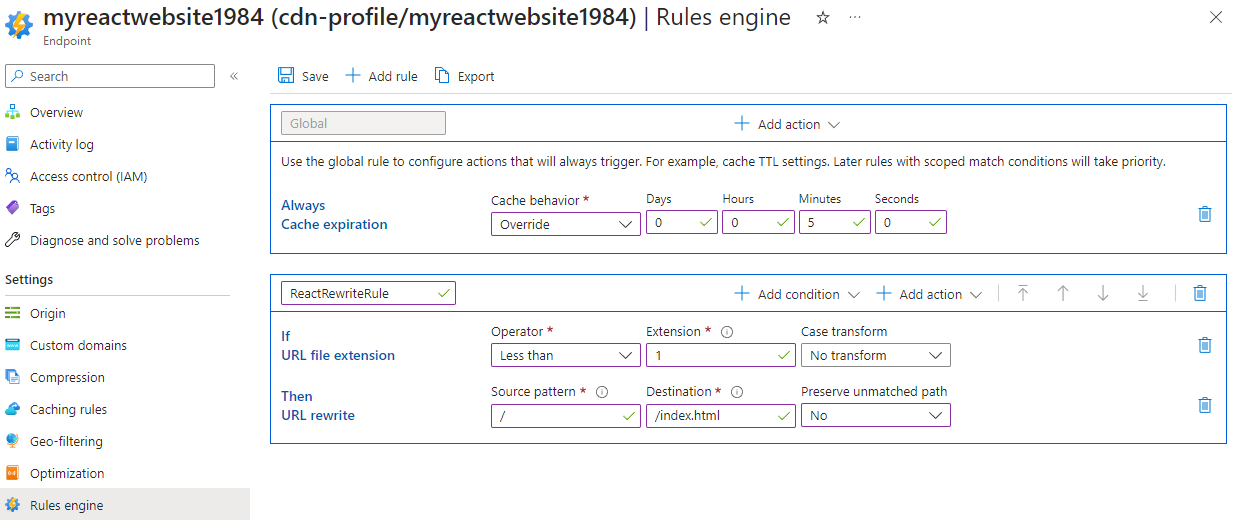 It is also useful to add the global action with the “Cache expiration” action type and set the expiration time to some reasonable value. For development environment, you can set it to 5 minute.
Don’t forget to click on the “Save” button to save the changes. The changes need to be propagated to the CDN nodes. It can take up to 15 minutes.
Deploying React app to Azure Storage Account
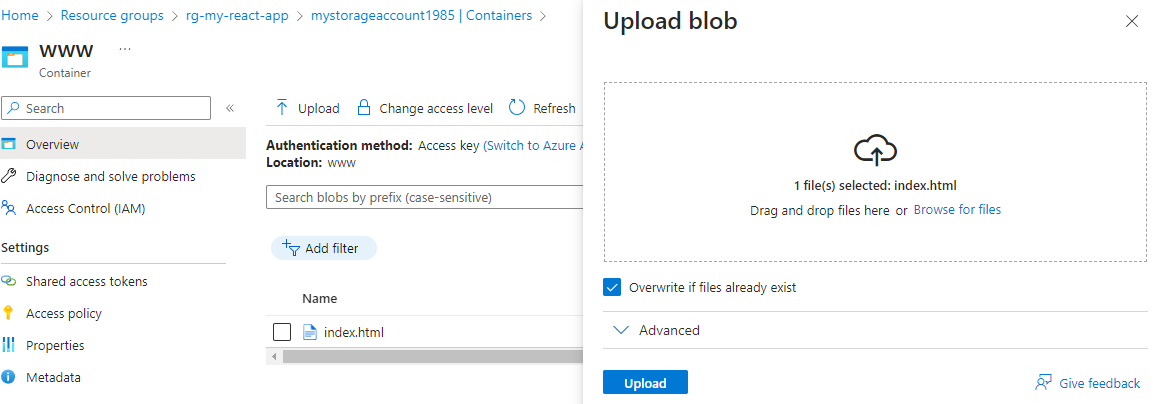
If you are reading this, then you probably already have a React app. For the sake of simplicity, we will use the React app from the React tutorial. Save it to the local folder as “index.html” file. Then open the Azure Storage account that we created earlier and go to the container. Then click on the “Upload” button and select the “index.html” file. Then click on the “Upload” button to upload the file to the container.
Verifying the deployment
Now we can verify that the React app is deployed to the Azure Storage account.
To do that, go to the Azure CDN profile Endpoint that we created earlier and click on the link under the “Endpoint hostname” label.
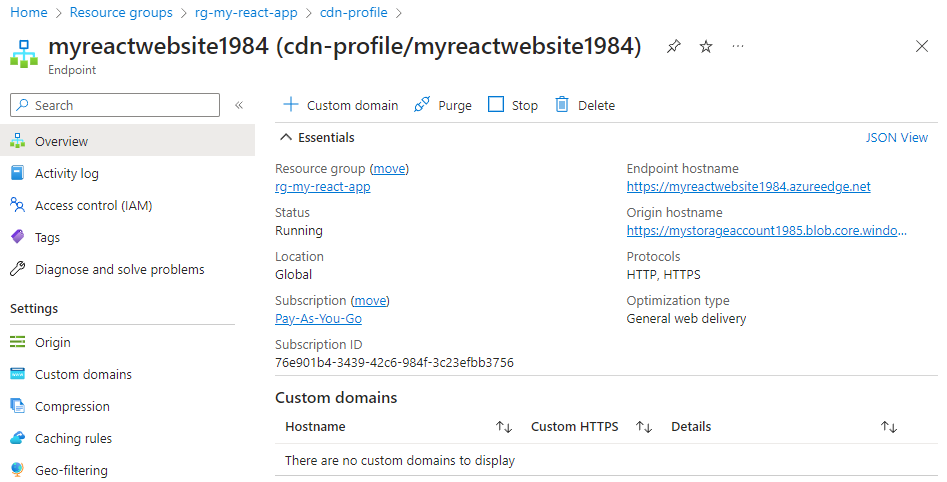 You should see the react app from the tutorial.

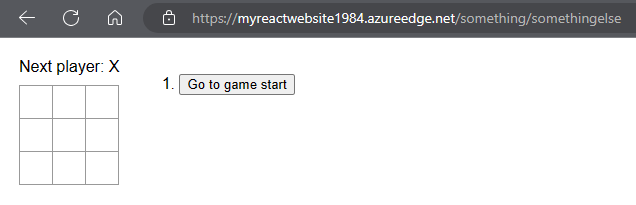
And if you add something to the URL, you should see the same page. That means that the rules are configured correctly and your React app should work as expected.
Automation
If you want to automate the infrastructure creation process then take a look at this gist, where you can find the terraform template that will create the Azure Storage account and Azure CDN profile with the endpoint.
If you want to automate the deployment process then take a look at this gist, where you can find the GitLab CI/CD pipeline that will deploy your React app to the Azure Storage account.